Balazo Gallery
Related Articles
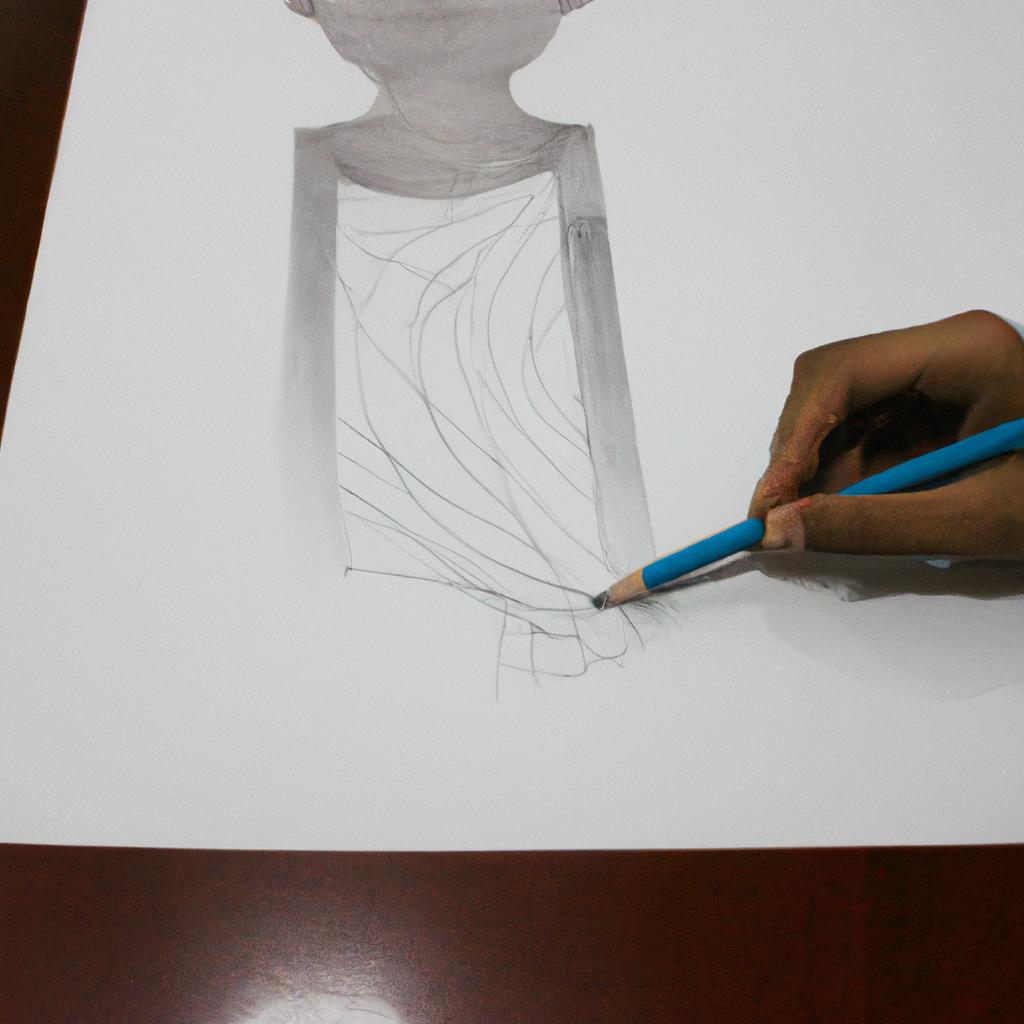
Portrait drawing is a captivating art form that requires skill, precision, and creativity. Artists have been capturing the essence of their subjects through portraits for centuries, using various techniques to bring their drawings to life. From charcoal sketches to intricate pencil renderings, portrait drawing offers a unique way of portraying individuals and evoking emotions. This article aims to explore the artistic techniques involved in portrait drawing and provide valuable photography tips to enhance the process.
To illustrate the significance of portrait drawing, let us consider an imaginary scenario where a renowned artist undertakes a commission to create a lifelike portrait of a prominent figure in society. Through careful observation and meticulous attention to detail, the artist captures not only the physical attributes but also the personality and inner essence of the subject. By studying different angles, lighting conditions, and facial expressions, artists can convey emotions with each stroke of their pencil or brush.
In this article, we will delve into various artistic techniques employed by portrait artists such as shading, proportioning features, and capturing likeness. Additionally, we will discuss how photography can serve as a valuable tool for reference when creating portraits. With the advancement of technology and accessibility of high-quality cameras, photographers can assist artists by providing well-lit photographs from different perspectives. Understanding these techniques and utilizing photography as a reference can greatly enhance the accuracy and realism of a portrait drawing.
One of the fundamental techniques in portrait drawing is shading. By carefully observing the play of light and shadow on the subject’s face, artists can create depth and dimension. Understanding how to use various shading techniques, such as hatching, cross-hatching, and blending, allows artists to capture the contours and subtle nuances of facial features.
Proportioning features correctly is another crucial aspect of portrait drawing. Artists must have a keen eye for accurately measuring distances between different facial elements like eyes, nose, mouth, and ears. This attention to detail ensures that the final drawing maintains a realistic resemblance to the subject.
Capturing likeness goes beyond simply replicating physical features; it involves capturing the unique characteristics that make an individual recognizable. Artists achieve this by paying close attention to details like facial expressions, wrinkles, scars, or any distinctive features that define a person’s identity. A good understanding of anatomy also helps in portraying accurate proportions and capturing the essence of the subject.
While these artistic techniques are essential for creating lifelike portraits, photography can serve as a valuable tool throughout the process. Photographers can collaborate with artists by providing well-composed photographs that showcase different angles and lighting conditions. These reference photos allow artists to study intricate details that may not be visible during live sittings. Additionally, photographers can experiment with different lighting setups to create dramatic effects or highlight specific features that artists can then incorporate into their drawings.
In conclusion, portrait drawing is an art form that requires skillful technique and creative vision. By employing shading techniques, proportioning features accurately, and capturing likeness through careful observation, artists bring their subjects to life on paper. Photography serves as an invaluable tool for reference during the process, assisting artists in capturing various angles and lighting conditions not possible during live sittings. Through collaboration between photographers and artists, portrait drawings can attain a level of realism and accuracy that truly captures the essence of the subject.
Understanding the Basics of Portrait Composition
When it comes to portrait drawing, understanding the basics of composition is essential in creating a visually appealing and engaging artwork. By effectively composing your portraits, you can capture the essence and personality of your subject while creating a compelling visual narrative.
To illustrate this point, let’s take the example of Sally, a skilled artist who wanted to create a portrait of her grandmother. Instead of simply placing her grandmother at the center of the canvas, Sally decided to apply some basic compositional techniques. She positioned her grandmother slightly off-center, emphasizing her vibrant smile as she interacted with her beloved garden. This deliberate placement created an interesting dynamic within the composition, capturing not only her grandmother’s likeness but also conveying a sense of joy and connection to nature.
To further enhance your understanding of portrait composition, consider these key elements:
- Rule of Thirds: The rule of thirds divides the canvas into nine equal parts using two horizontal lines and two vertical lines intersecting at four points. Placing your subject along one or more intersection points creates a balanced yet captivating composition.
- Leading Lines: Utilize leading lines such as paths, fences, or gestures within the portrait to guide viewers’ eyes towards important focal points. These lines add depth and directionality to your artwork.
- Negative Space: Don’t overlook negative space—the areas surrounding and between objects—in your composition. Thoughtful use of negative space can help emphasize your subject by providing contrast and allowing them to stand out.
- Framing Devices: Consider incorporating framing devices like doorways or windows within your composition to provide context and draw attention to your subject.
By applying these principles when composing your portraits, you can elevate your artwork beyond mere representation and evoke emotional responses from viewers.
Moving forward into our next section on “Choosing the Right Materials for Portrait Drawing,” let us explore how selecting suitable tools will contribute to enhancing both the technical execution and artistic expression of your portraits.
Choosing the Right Materials for Portrait Drawing
Now that we have explored the fundamental concepts behind portrait composition, let us delve into the crucial aspect of choosing the right materials for portrait drawing. Before we proceed, let’s consider an example to understand how materials can greatly impact the outcome of a portrait.
Imagine you are creating a portrait using oil pastels on rough-textured paper. The coarse surface of the paper will create gritty marks and uneven color application, resulting in a more expressive and textured rendering. On the other hand, if you were to use graphite pencils on smooth bristol board, your lines would be precise and clean, leading to a smoother and detailed representation.
When it comes to selecting materials for portrait drawing, several factors should be considered:
- Medium: Each medium has its unique properties that contribute to different effects. For instance, charcoal offers rich dark values and is ideal for capturing dramatic lighting, while colored pencils provide vibrant colors suitable for subtle nuances.
- Paper: The texture and weight of the paper influence both the appearance and durability of your artwork. Rougher surfaces add depth and texture through visible strokes, whereas smoother surfaces lend themselves well to intricate details.
- Tools: Different tools such as brushes, blending stumps, or erasers can aid in achieving specific textures or effects within your portraits.
- Support: Choosing the appropriate support material is essential for preserving your artwork over time. Ensure that your chosen support is acid-free and designed specifically for your preferred medium.
By carefully considering these aspects before starting a portrait drawing, you can enhance your ability to convey emotions effectively through your art.
Moving forward with our exploration of portraiture techniques, we will now focus on mastering the proportions and anatomy of the human face. This understanding forms the foundation upon which realistic facial representations are built
Mastering the Proportions and Anatomy of the Human Face
Having discussed the importance of choosing the right materials for portrait drawing, we now turn our attention to mastering the proportions and anatomy of the human face. Understanding these fundamental elements is essential in creating realistic and accurate portraits that capture the true essence of a person.
Paragraph 1:
Let us consider an example to illustrate this point. Imagine you are attempting to draw a portrait of your favorite actor or actress. You begin by sketching their facial features without paying much attention to proportion or structure. As a result, the final artwork does not resemble them as closely as you had hoped. This highlights the significance of understanding facial proportions and anatomical details when it comes to portrait drawing.
Paragraph 2:
To assist you in honing your skills, here are some key guidelines to keep in mind:
- The eyes should be placed approximately halfway down the face.
- The distance between the eyes is roughly equal to one eye’s width.
- The bottom of the nose aligns with the bottom of the ears.
- The mouth typically extends vertically from pupil to pupil.
| Facial Feature | Ideal Placement |
|---|---|
| Eyes | Approximately halfway down the face |
| Eye Distance | Equal to one eye’s width |
| Nose Bottom | Aligns with bottom of ears |
| Mouth | Vertically from pupil to pupil |
These principles serve as a foundation upon which you can build more complex details later on. By grasping these basic concepts, you will have better control over capturing likeness and achieving greater realism in your portraits.
Paragraph 3:
As we delve into exploring different techniques for shading and texturing in subsequent sections, remember that mastering proportions and anatomy lays a strong groundwork for successful portraiture. With practice, patience, and attention to detail, you will gradually develop the ability to capture the essence and character of your subjects. So, let us now embark on this journey of discovering effective shading and texturing techniques.
Transition into next section:
With an understanding of facial proportions firmly established, we can now delve into exploring different techniques for shading and texturing in order to bring our portraits to life.
Exploring Different Techniques for Shading and Texturing
To truly bring a portrait to life, mastering shading and texturing techniques is essential. By skillfully incorporating light and shadow, artists can create depth and dimension, capturing the essence of their subject. In this section, we will explore various methods that artists employ to achieve realistic shading effects in portrait drawing.
One effective technique is cross-hatching, which involves layering parallel lines in different directions to create texture and volume. For example, imagine an artist using cross-hatching to depict the roughness of an elderly man’s weathered skin. The careful placement of intersecting lines adds depth and character to the portrait, conveying a sense of history and experience.
In addition to cross-hatching, artists often utilize stippling—a method where tiny dots are applied systematically—to create textures such as freckles or stubble on a face. This meticulous approach allows for precise control over the level of detail within a specific area. By varying the density and spacing of the dots, artists can evoke different textures with remarkable accuracy.
When it comes to shading larger areas smoothly, blending techniques become indispensable. Artists use tools like tortillons (blending stumps) or soft brushes to gently blend graphite or charcoal strokes together, resulting in seamless transitions between light and dark tones. This technique requires patience and practice but yields stunning results when executed effectively.
The ability to master these shading and texturing techniques empowers artists to breathe life into their portraits through visual storytelling. Whether it be capturing emotions etched onto a face or highlighting unique physical features, skilled artists can convey depth and personality with every stroke.
Next Section: Utilizing Lighting and Shadows in Portrait Photography
Utilizing Lighting and Shadows in Portrait Photography
In the previous section, we delved into various techniques that can be employed to achieve effective shading and texturing in portrait drawings. Now, let us turn our attention to another crucial aspect of portraiture – utilizing lighting and shadows in portrait photography.
To illustrate this point, let’s consider a hypothetical scenario where a photographer is capturing a portrait indoors with natural light streaming through a window. By strategically positioning the subject near the window, they are able to take advantage of the soft, diffused light that creates gentle shadows on their face. This technique helps add depth and dimension to the photograph, enhancing its overall visual appeal.
When it comes to using lighting and shadows effectively in portrait photography, here are some key considerations:
- Direction of Light: Experimenting with different angles of light can dramatically alter the mood and aesthetic of your portraits.
- Intensity of Light: Adjusting the intensity or brightness of light sources allows you to control how much shadow is cast on your subject.
- Shadows as Design Elements: Shadows can serve as compositional tools by adding interest and leading the viewer’s eye towards specific areas within the frame.
- Creative Lighting Techniques: From backlighting to silhouettes, there are numerous creative ways to utilize lighting and shadows for more artistic and visually captivating portraits.
Table 1 below provides an overview of these considerations along with their effects on portrait photography:
| Consideration | Effect |
|---|---|
| Direction of Light | Alters mood |
| Intensity of Light | Controls shadow amount |
| Shadows as Design Elements | Adds interest |
| Creative Lighting Techniques | Enhances artistry |
By understanding these factors and experimenting with them creatively, photographers can elevate their portraits from being merely well-exposed images to emotionally engaging works of art. In our subsequent section about “Capturing Expressions and Emotions in Portraits,” we will explore how to effectively convey the subject’s emotions through various techniques, ensuring that their unique personality shines through in every photograph.
Now let us delve into the art of capturing expressions and emotions in portraits.
Capturing Expressions and Emotions in Portraits
Building upon the knowledge of lighting techniques, understanding how to effectively use lighting and shadows is crucial for creating captivating portraits. By skillfully manipulating light and shadow, photographers can enhance the mood, depth, and overall visual impact of their subjects.
Case Study: For instance, let’s imagine a portrait photographer named Sarah who aims to capture a dramatic black and white portrait. To achieve this effect, she strategically positions her subject near a single source of light, casting strong shadows across half of the face while illuminating the other side with soft light. This deliberate play between light and shadow adds dimensionality to the image, evoking an intense emotional response from viewers.
In order to master the art of utilizing lighting and shadows in portrait photography, consider the following key points:
- Directional Light: Experiment with various angles at which light falls on your subject. Depending on whether you want to emphasize or minimize certain facial features or expressions, adjusting the direction of light can significantly alter the mood portrayed in a photograph.
- Contrast Control: Manipulate the contrast by carefully controlling both highlights and shadows. Balancing these two elements allows for more dynamic images that draw attention to specific areas within the frame.
- Reflectors and Diffusers: Utilize reflectors to bounce off light onto your subject from different angles or employ diffusers to soften harsh lighting conditions. These tools provide greater control over illumination levels, resulting in more flattering portraits.
- Silhouettes: Explore incorporating silhouettes into your compositions as they possess an inherent artistic allure. Using backlighting against a dark background can create striking outlines showcasing intriguing shapes without revealing intricate details.
Table (Emotions Evoked):
| Emotion | Technique | Example |
|---|---|---|
| Serenity | Soft Lighting | A tranquil portrait bathed |
| in gentle, diffused light. | ||
| Mystery | Side Lighting | Half face illuminated by |
| a single directional source. | ||
| Intimacy | Low Key | A subject enveloped in deep |
| shadows, with minimal highlights. | ||
| Drama | High Contrast | Strong play between dark |
| shadows and bright highlights. |
In summary, mastering the art of utilizing lighting and shadows in portrait photography opens up endless possibilities for creative expression. By carefully considering the direction, contrast, and techniques such as reflectors or silhouettes, photographers can evoke specific emotions within their viewers. Through intentional manipulation of light and shadow, portraits become more than just mere representations; they transform into powerful visual narratives that resonate deeply with the audience.