Balazo Gallery
Related Articles
The use of charcoal as a medium for drawing and photography has long been recognized for its unique ability to convey depth, texture, and tonal variations. This article explores the techniques employed in charcoal drawings and their application in enhancing artistic skills in both photography and traditional drawing. By examining the properties of charcoal and understanding how to manipulate it effectively, artists can create stunning images that capture the essence of their subjects.
For instance, consider a hypothetical case study of an aspiring artist who is passionate about capturing landscapes through their camera lens. While they have developed proficiency in photography, they feel limited by the two-dimensional representation offered by digital images alone. Through experimentation with charcoal drawing techniques such as blending, smudging, and cross-hatching, this artist can add layers of dimensionality and expressiveness to their photographs. The resulting mixed-media artwork merges the precision of digital photography with the emotive qualities achieved through charcoal rendering – offering viewers a more immersive experience of the landscape.
Understanding the Basics of Charcoal
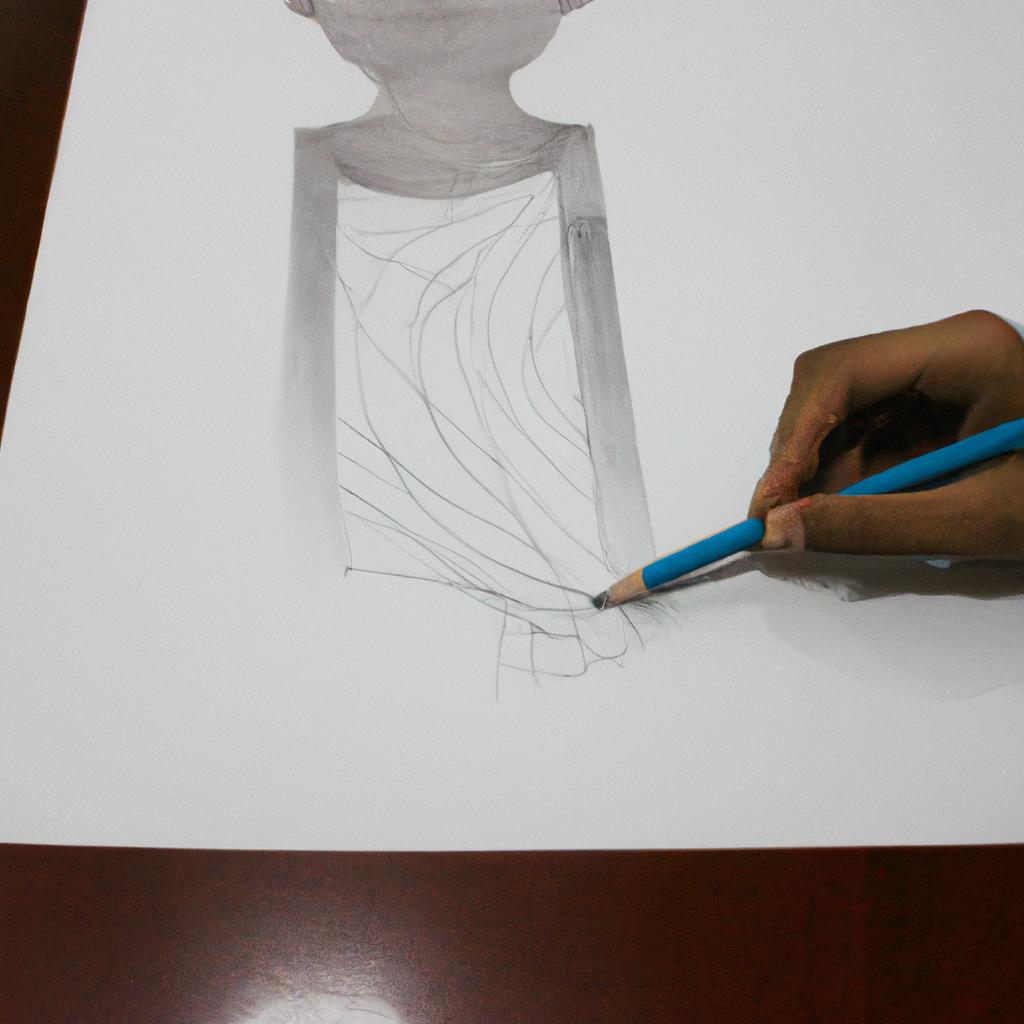
Charcoal drawing is a versatile and expressive art form that has been practiced for centuries. By using charcoal sticks or pencils, artists can create rich tones and textures on paper, allowing for a wide range of artistic possibilities. This section will provide an overview of the basics of charcoal, including its composition, tools used in charcoal drawing, and techniques employed by artists.
To better understand the characteristics of charcoal, let’s consider an example: imagine an artist who wants to capture the dramatic lighting in a portrait. They choose to use charcoal because it allows them to achieve deep shadows and highlights with ease. The soft texture of the medium enables smooth blending and shading effects, enhancing the three-dimensionality of their artwork.
When working with charcoal, there are several important considerations:
- Versatility: Charcoal can be manipulated easily, making it suitable for various styles and subjects.
- Intensity: The dark value that charcoal produces adds drama and depth to drawings.
- Expressiveness: Due to its porous nature, charcoal creates unique textures and marks on paper.
- Blending: Artists often utilize techniques like smudging or erasing to blend different values together seamlessly.
The following table showcases some common tools used in charcoal drawing:
| Tool | Description |
|---|---|
| Charcoal sticks | These come in different degrees of hardness; softer ones produce darker lines while harder ones offer more control. |
| Charcoal pencils | Similar to graphite pencils but made from compressed powdered charcoal; they allow for precise detailing. |
| Vine or Willow charcoal | Made from burning thin twigs; these create delicate lines ideal for initial sketching. |
| Kneaded eraser | A malleable eraser that helps lift off excess pigment or create highlights through gentle dabbing motions. |
By understanding the basics of charcoal—its versatility, intensity, expressiveness, and blending techniques—you can begin to explore the vast possibilities of this medium. In the subsequent section, we will delve into exploring different types of charcoal, further expanding your artistic repertoire.
(Note: The next section about “Exploring Different Types of Charcoal” will discuss various forms of charcoal such as compressed charcoal, powdered charcoal, and charcoal pencils.)
Exploring Different Types of Charcoal
Enhancing Artistic Skills in Photography and Drawing Through Charcoal Techniques
Building upon the foundation established in understanding the basics of charcoal, this section delves into exploring different types of charcoal. By familiarizing oneself with these variations, artists can expand their range of artistic expression and achieve unique effects within their artwork.
One example that demonstrates the versatility of charcoal is a landscape drawing featuring contrasting textures. Using vine charcoal for creating soft gradations and willow charcoal for producing bold lines, an artist can capture the interplay between smooth surfaces like water and rough elements such as rocks or tree barks. This combination allows for a dynamic portrayal of nature’s complexity, enhancing visual impact through stark contrasts.
To fully grasp the potential offered by various types of charcoal, it is essential to understand their distinct characteristics:
- Vine Charcoal: A soft type of charcoal derived from grapevines, vine charcoal offers excellent blending capabilities due to its powdery texture.
- Willow Charcoal: Similar to vine charcoal but slightly harder, willow charcoal provides greater control over line thickness while maintaining ease in smudging.
- Compressed Charcoal: Made by compressing powdered charcoal into sticks or pencils, compressed charcoal is ideal for achieving intense dark tones and sharp edges.
- Powdered Charcoal: Finely ground powder form of natural or synthetic charcoals used primarily for large-scale drawings or tonal washes.
In addition to varying types of charcoal, artists can experiment with different techniques using these materials to create captivating artworks. The following table showcases some popular techniques along with their corresponding emotional effects:
| Technique | Emotional Effect |
|---|---|
| Hatching | Creates depth and dimension |
| Cross-hatching | Adds complexity and tension |
| Stippling | Evokes a sense of mystery |
| Smudging | Produces softness and harmony |
By employing these techniques judiciously, artists can evoke a wide range of emotions within their audience and enhance the overall impact of their artwork.
Transitioning smoothly into the subsequent section about choosing the right paper for charcoal drawing, understanding different types of charcoal serves as a crucial foundation. By combining this knowledge with appropriate materials, artists can further refine their skills and achieve desired artistic outcomes.
Choosing the Right Paper for Charcoal Drawing
In the world of charcoal drawing, artists have a plethora of options to choose from when it comes to selecting the right type of charcoal for their creations. Each type offers unique qualities that can greatly impact the final outcome of an artwork. By understanding and experimenting with different types of charcoal, artists can expand their artistic possibilities and enhance their skills in photography and drawing.
Let’s consider a hypothetical example: imagine an artist who is passionate about creating realistic portraits using charcoal. They start by using compressed charcoal sticks, which offer dense pigmentation and are ideal for rendering bold lines and dark shadows. However, they soon realize that blending becomes challenging due to the stick’s hard texture. Seeking softer alternatives, they transition to vine charcoal, which allows for easier smudging and blending techniques while maintaining a lighter touch on the paper surface.
When exploring different types of charcoal, there are several factors to consider:
-
Hardness: Charcoal sticks come in varying degrees of hardness – soft, medium, or hard. Soft charcoals produce darker tones with minimal effort but tend to smudge easily. On the other hand, harder charcoals offer more control over details but may require additional pressure during application.
-
Texture: Some charcoals have smooth textures that glide effortlessly across the paper surface, making them ideal for quick sketches or expressive strokes. Others have rougher textures that create interesting visual effects like grainy marks or gritty surfaces.
-
Fixability: Certain types of charcoal can be fixed onto the paper using fixatives or sprays, allowing artists to preserve their artwork without worrying about smudging or fading over time.
-
Combinations: Artists often experiment with combining different types of charcoal within a single piece to achieve desired effects. This could involve layering soft charcoal over hard charcoal for added depth or incorporating white conte crayon highlights for contrast.
By familiarizing themselves with these various aspects and experimenting with different types of charcoal, artists can expand their range of techniques and find the perfect medium to bring their artistic vision to life.
Transitioning seamlessly into the subsequent section on “Blending Techniques to Create Depth and Texture,” we delve deeper into how artists can further enhance their charcoal drawings through blending methods that add depth and texture.
Blending Techniques to Create Depth and Texture
Having discussed the importance of selecting appropriate paper for charcoal drawing, it is now crucial to delve into the various techniques that can be employed to enhance depth and texture in your artwork. By mastering these techniques, artists can bring their drawings to life, capturing a wide range of tones and textures on paper.
One effective technique used by many artists is hatching. Hatching involves creating parallel lines with varying lengths and distances between them. This method allows for the creation of shading effects and gives an illusion of form and dimensionality. For instance, consider an artist seeking to depict a still-life composition of fruits using charcoal. By skillfully applying hatching strokes, they can convey the roundness or juiciness of each fruit, transforming a two-dimensional image into one that appears three-dimensional.
To further explore different approaches to charcoal drawing, consider incorporating some additional techniques:
- Stippling: Using small dots or marks instead of continuous lines helps create texture and tonal variation.
- Cross-hatching: Overlapping sets of parallel lines create darker values and add complexity to shading.
- Smudging: Blending charcoal with fingers or blending tools softens edges and transitions between areas, resulting in smoother gradients.
- Flicking: Lightly tapping or flicking the charcoal against the paper creates speckled effects suitable for rendering rough surfaces like tree bark or rocks.
By employing these techniques judiciously, artists have the opportunity to imbue their work with remarkable depth and texture.
| Technique | Description |
|---|---|
| Hatching | Creating parallel lines with varying lengths and distances |
| Stippling | Using small dots or marks instead of continuous lines |
| Cross-hatching | Overlapping sets of parallel lines for darker values |
| Smudging | Blending charcoal with fingers or blending tools |
| Flicking | Lightly tapping or flicking the charcoal against the paper |
As artists continue to refine their skills in these techniques, they gain a deeper understanding of how each method can contribute to the overall visual impact and emotional resonance of their artwork. In turn, this knowledge empowers them to express their creativity with greater precision and nuance.
Transition into the subsequent section:
Having explored various charcoal techniques for creating depth and texture, it is now time to focus on another crucial aspect of drawing: highlighting and incorporating erasers and other tools into your artistic process. By employing these tools effectively, artists can introduce luminosity and enhance specific areas within their compositions.
Using Erasers and Other Tools for Highlights
To enhance the realism and depth of a charcoal drawing, artists often employ various tools to add highlights and bring attention to certain areas. One effective tool is an eraser, which can be used strategically to lighten specific parts of the composition. For instance, imagine a portrait where the subject’s eyes are meant to capture the viewer’s gaze. By gently lifting off some of the charcoal with an eraser from these areas, it is possible to create a striking contrast between light and dark tones, intensifying the impact.
In addition to traditional erasers, kneaded erasers provide another valuable option for adding highlights in charcoal drawings. These pliable erasers allow for more precise control when shaping or refining lighter areas within the artwork. This versatility makes them particularly useful when working on intricate details such as wisps of hair or delicate textures like lace patterns.
When using erasers or any other highlighting tool, it is crucial for artists to consider their intended effect carefully. Here are several key points to keep in mind:
- Contrast: Utilize varying degrees of pressure while applying an eraser to achieve different levels of brightness and emphasize contrasts between light and shadow.
- Texture: Experiment with different types of erasers (such as vinyl or gum) to explore their effects on texture variations within your work.
- Gradation: Gradually fade out highlighted areas by softening edges using blending stumps or fingers; this technique creates smooth transitions between light and dark regions.
- Experimentation: Test different techniques and combinations of materials/tools on smaller sketches or test papers before incorporating them into larger works.
By employing these strategies thoughtfully, artists can elevate their charcoal drawings through skillful use of highlighting techniques that enhance the overall composition and bring attention to specific elements.
With a solid understanding of highlight creation, we can now delve into the technique of cross-hatching to add detail and contrast in charcoal drawings.
Adding Detail and Contrast with Cross-Hatching
Section H2: Enhancing Depth and Dimension with Shading Techniques
In the previous section, we explored how to use erasers and other tools for creating highlights in charcoal drawings. Now, let’s delve into another essential aspect of charcoal drawing techniques: enhancing depth and dimension through shading.
Shading is a fundamental skill that can greatly enhance the realism and three-dimensionality of your artwork. By mastering different shading techniques, you can create the illusion of light and shadow, adding depth and volume to your subjects. Take, for example, a still life composition featuring a vase of flowers. Through careful observation and application of shading techniques, you can bring out the roundness of each petal, capturing the way light interacts with their surfaces.
To effectively employ shading techniques in your charcoal drawings, consider incorporating the following strategies:
- Graduated Tone: Achieve smooth transitions from light to dark by gradually increasing or decreasing pressure on your charcoal. This technique helps create realistic gradients and subtle variations in value.
- Cross Contour Lines: Use curved lines that follow the form of an object to indicate its shape and structure. These lines give the impression of volume and suggest how shadows would fall across its surface.
- Chiaroscuro: Embrace contrast by combining areas of intense darkness (shadow) with areas of bright illumination (light). This classic technique emphasizes dramatic lighting effects while accentuating the overall depth within your drawing.
- Atmospheric Perspective: Depict distance by employing lighter values for objects appearing farther away. This mimics how atmospheric particles cause objects in our line of sight to appear less defined due to haze.
To further illustrate these concepts visually, refer to the table below depicting various shading techniques commonly used in charcoal drawing:
| Technique | Description |
|---|---|
| Hatching | Creating parallel lines |
| Stippling | Using dots or small marks |
| Smudging | Blending with a finger or tool |
| Scumbling | Applying charcoal in circular motions |
By incorporating these shading techniques into your charcoal drawings, you will be able to add depth and dimension, making your artwork more visually impactful. Through the interplay of light and shadow, your subjects will come alive on the paper, engaging viewers’ emotions and captivating their imaginations.
Remember, mastering shading techniques takes practice and experimentation. Embrace the process and allow yourself room for exploration as you develop your own unique style within the realm of charcoal drawing.